Woocommerce + PayPal
Setting up PayPal with Woocommerce
Easily install PayPal plugin with your Woo shop and get quick support.
Built and supported by PayPal and PNX (Official PayPal Partner).
Table of Contents
Installation Manual
Instruction & Prerequisite
Advanced PayPal Payments for WooCommerce – developed by PNX software – PayPal Certificated Official Partner.
Prerequisite
To install Advanced PayPal Payments for WooCommerce, you need:
-
- WordPress Version 5.3 or above
- WooCommerce Version 3.9 or above (installed and activated)
- PHP Version 7.2 or above
- PayPal business or personal account
Installation
How to install the plugin?
You can chose one of below methods to install the plugin.
1. Please download the plugin.
2. Log in to WordPress Admin.
2. Go to Plugins > Add New.
3. Click on the button Upload Plugin and upload the file you just downloaded.
5. Activate the plugin by clicking on Activate now on the success page.
If you’d like to activate it later, you can do it via Plugins >Installed Plugins.
Method 2: Install directly from WordPress wp-admin
1. Log in to WordPress Admin.
2. Go to Plugins > Add New.
3. Search for PNX PayPal.
4. Click on Install Now and wait until the plugin is installed successfully.
5. Activate the plugin by clicking on Activate now on the success page.
If you’d like to activate it later, you can do it via Plugins >Installed Plugins.
Tip: all the screenshots on this page are clickable to zoom in.
How to Configue
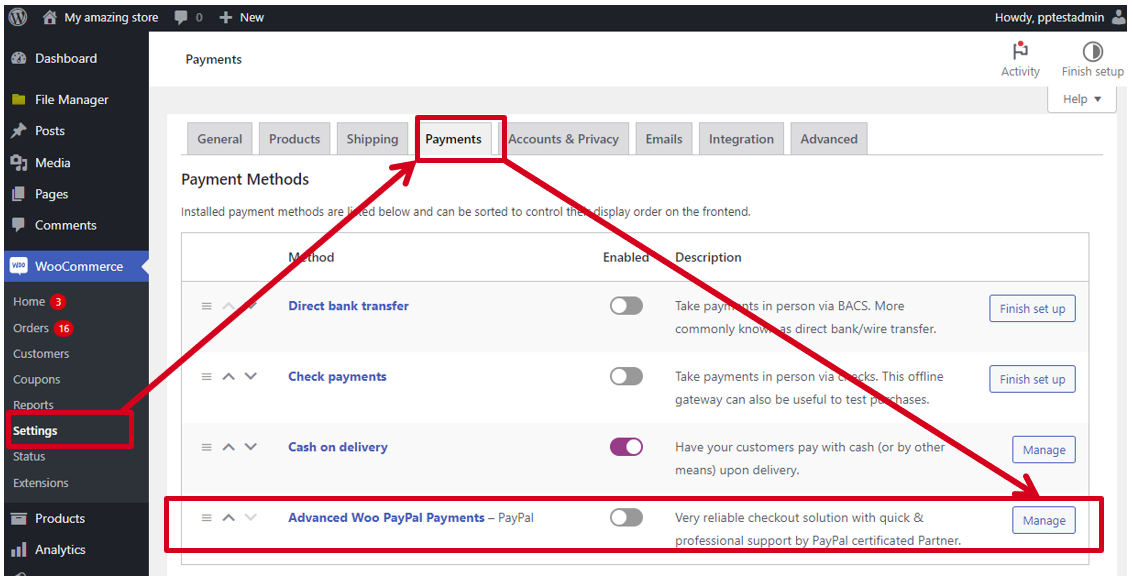
Go to Woocommerce > Settings > Payments, click on “Finish set up” for “Advanced PayPal Payments for WooCommerce”.
Connect PayPal
On the interface of PayPal setup, there are 2 tabs below.
– Connect PayPal
– Payments Options
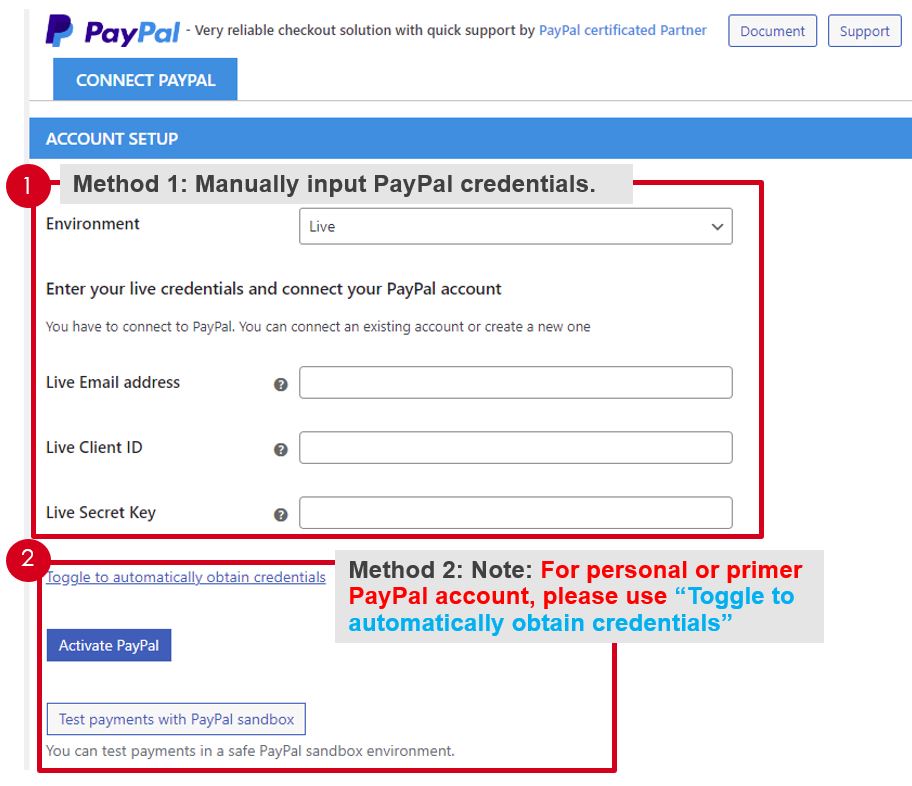
First under the tab of CONNECT PAYPAL, you can choose
– Method 1: input your PayPal infomation manually or
– Method 2: click “Toggle to automatically obtain credentials” and login PayPal to generate credentials automatically.
For Personal PayPal or Primer PayPal account, please have to use method 2.
– Personal or Primer PayPal account
Note: For personal or primer PayPal account, please have to use the method of “Toggle to automatically obtain credentials” and login to PayPal to generate credentials automatically.
– Business Account
For business PayPal acount, you can choose manual input PayPal credentials or “Toggle to automatically obtain credentials”.
Method 2: Automatically obtain PayPal credentials
1. Click the link of “Toggle to automatically obtain credentials“;
2. Click the buton “Activate PayPal” and it will popup a window of PayPal.com to login your PayPal account;
3. After you login, PayPal will ask if you “Allow PayPal to connect your account with your web site“, click the button “Agree and connect“.
4. And then all the credential will be obtained automatically.
5. On your web site, in the tab of “Payment options“, check the option of “Enable Advanced PayPal Payments for WooCommerce” and click button “Save“.
Congrats! Your store supports PayPal payments.
Method 1: Mannual input your PayPal credentials
For business PayPal acount, you can choose any method to connect PayPal.
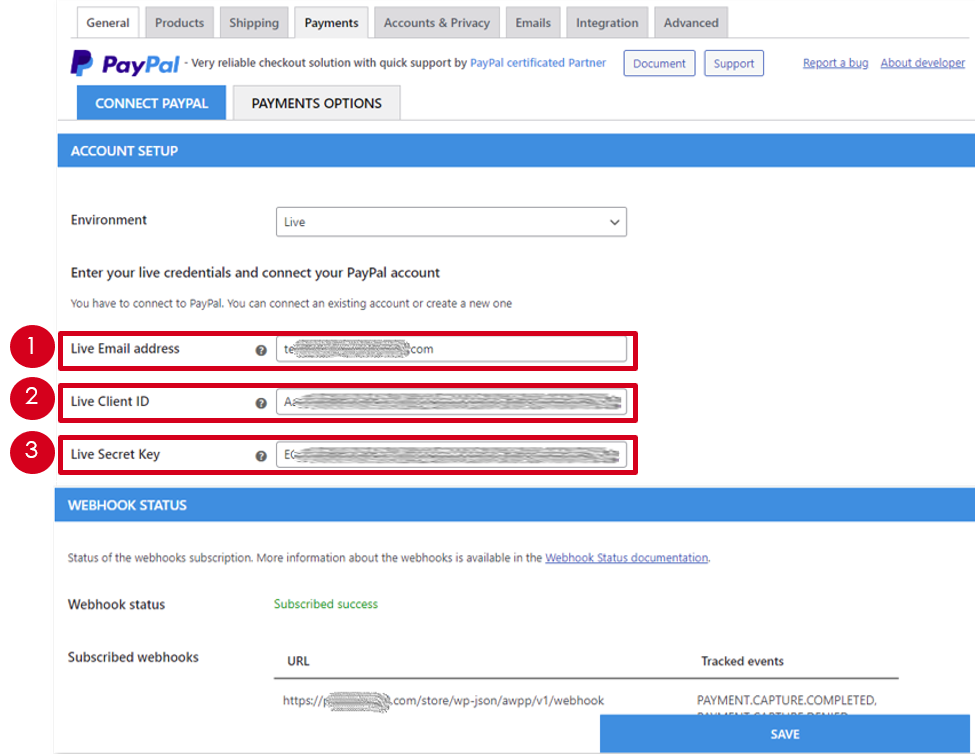
Please input your PayPal information below.
1. Live Email Address (Input your PayPal email)
2. Live Client ID
3. Live Secret Key
4. Click on SAVE after it’s done.
5. On your web site, in the tab of “Payment options“, check the option of “Enable Advanced PayPal Payments for WooCommerce” and and click button “Save“.
Congrats! Your store supports PayPal payments.
How to manually obtain Live Client ID & Live Secret Key?
If you’d like to test it prior to go live, please see the section of Sandbox Test.
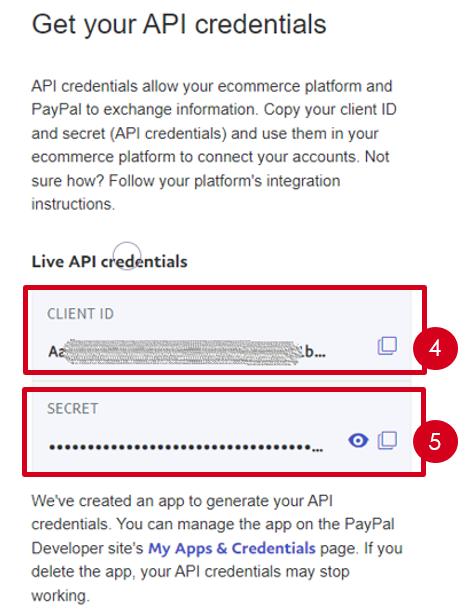
Obtain Client ID & Secret Key Mannually
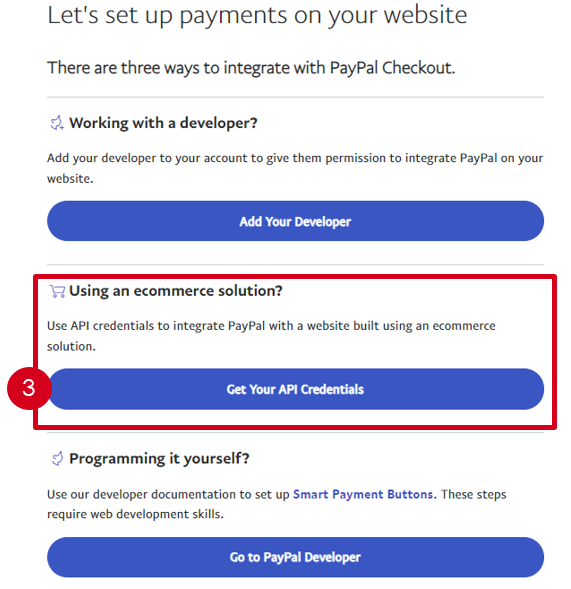
2. Click on Set Up Online Payments, you will be navigate to the URL https://www.paypal.com/commercesetup/webpayments
3. Click on Get Your API Credentials
4. Copy the CLIENT ID
5. Click on Eye icon to see & copy the SECRET.
Payment Options
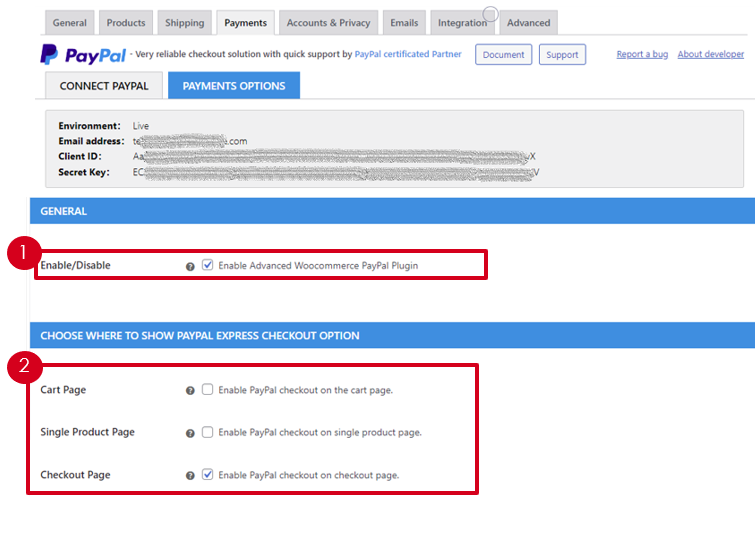
Once the CONNECT PAYPAL is done, please go to the tab of PAYMENT OPTIONS.
1. General
Enable or disable the PayPal payment. Check the option to enable it.
2. Choose where to show PayPal Express Check Option.
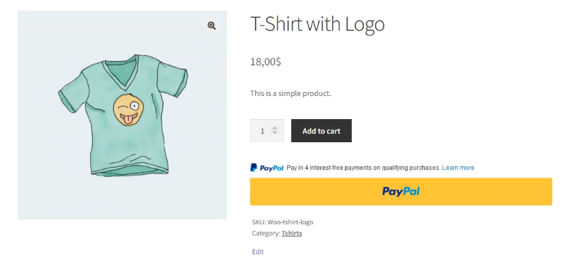
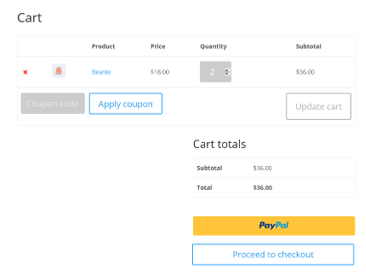
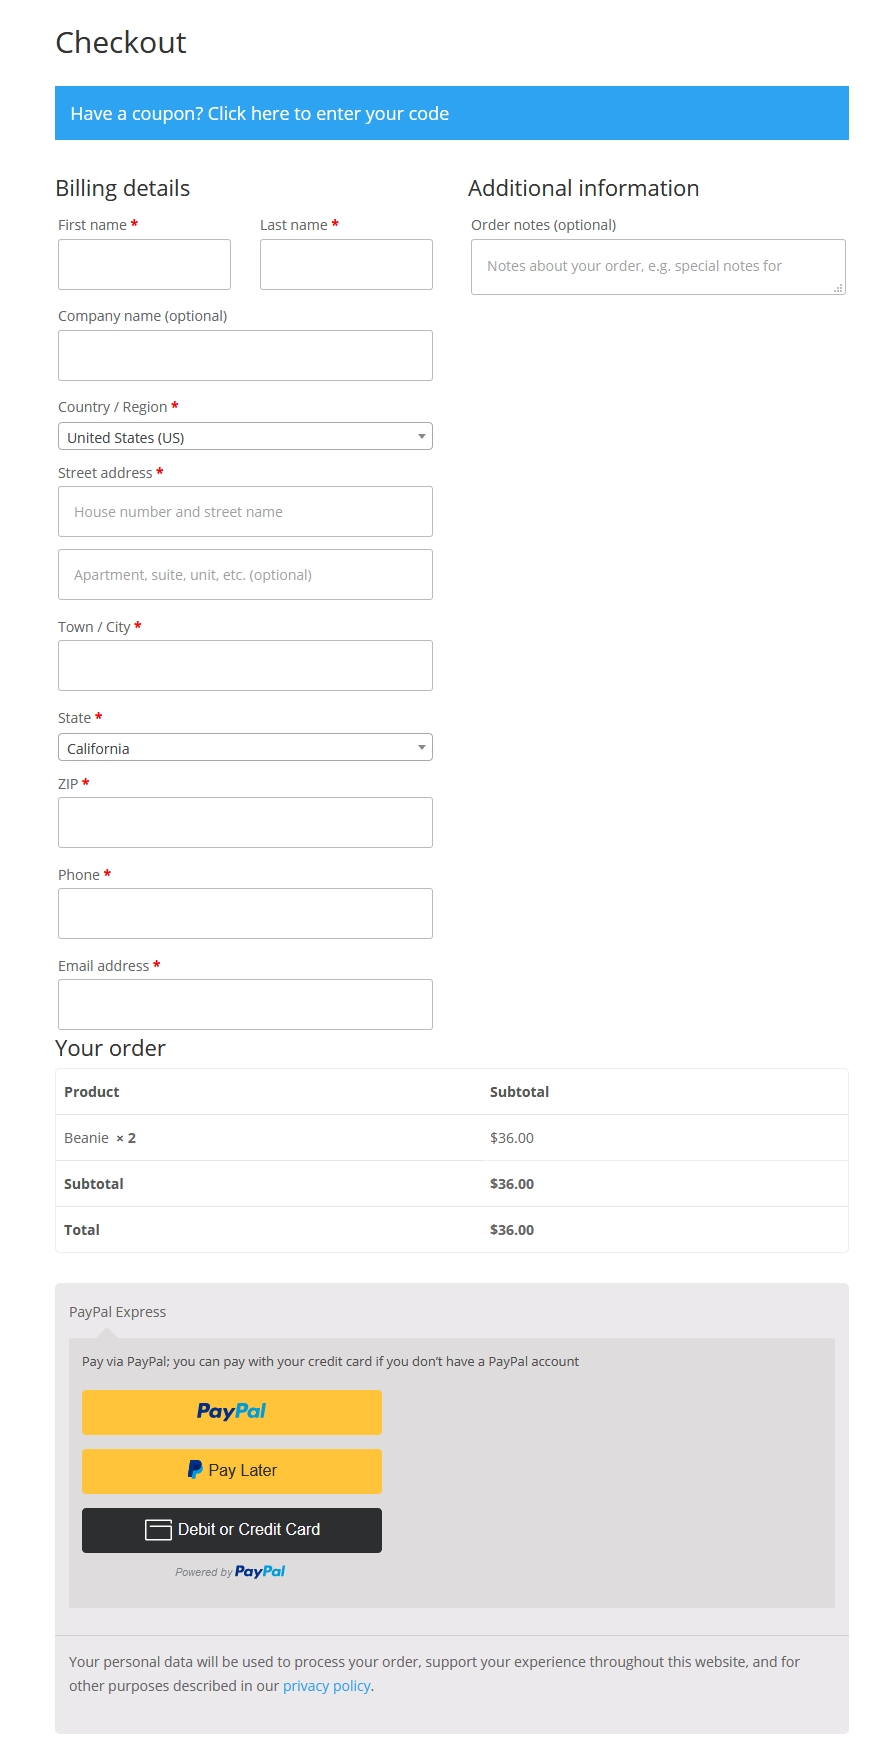
By default, the PayPal payment just displays on Checkout Page. If you’d like to make the PayPal payment buttons display on Cart or Single Product page, please check the options accordingly.
Other Payment Options
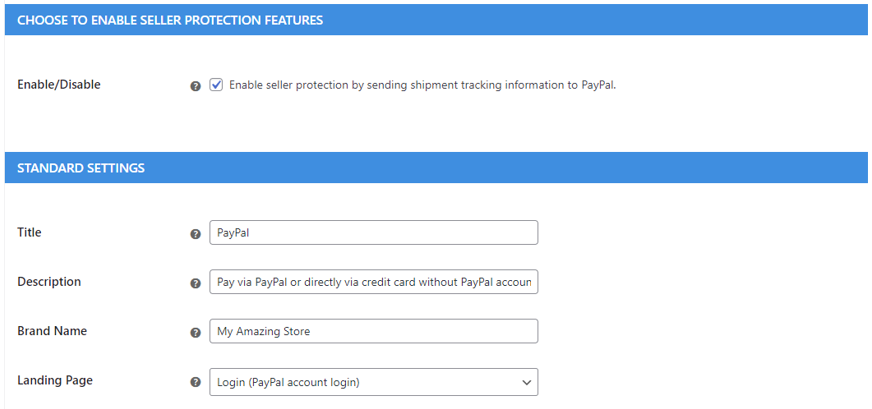
Enable Seller Protection Features
PayPal Seller Protection Policy is to protect your online sales, minimize claims and chargebacks and help prevent merchant fraud (more detail here). Once it’s enabled, in every orders paid by PayPal, on backend order detail page, you can see the order related seller protection information like the status of ELIGIBLE, PARTIALLY_ELIGIBLE or NOT_ELIGIBLE.
Please see the next page for the sample of order detail page.
Standard Settings
Title: The title that the user sees during Checkout.
Description: The description which the user sees during checkout.
Brand name: Merchant name of your shop that customers will see during the payment process.
Landing Page: Type of PayPal page to display.
Seller Protection Enabled
If the feature of Seller protection is enabled, on order detail page, there are two new sections.
1. Seller protection (Shipping):
Input the shipping information here in case certain order could has complaints, which can affect your merchant PayPal balance. But with Seller Protection, if the transaction meets PayPal requirements, PayPal will help keep your balance intact. The sipping information is one of the important factor for PayPal reference to process it.
2. Seller Protection Status
The status is from PayPal and indicates if the order is eligible for seller protection or not. It could be ELIGIBLE, PARTIALLY_ELIGIBLE or NOT_ELIGIBLE.
Custom Button Style
The PayPal button style can be customized here such as button size, style and color.
Under the tab of PAYMENT OPTIONS, the section of Custome button can be found.
Debug log & Invoice Prefix
In the sections of OTHER SETTINGS, can see the options below.
Debug Log: Enabling logging should be checked when payment transaction fails for unknown reasons or general troubleshooting purposes.
Invoice Prefix: If using one PayPal seller account on multiple systems, a distinct prefix should separate those installations, as PayPal just accepts unique invoice numbers by default.
Hide or Show Funding Source(s)
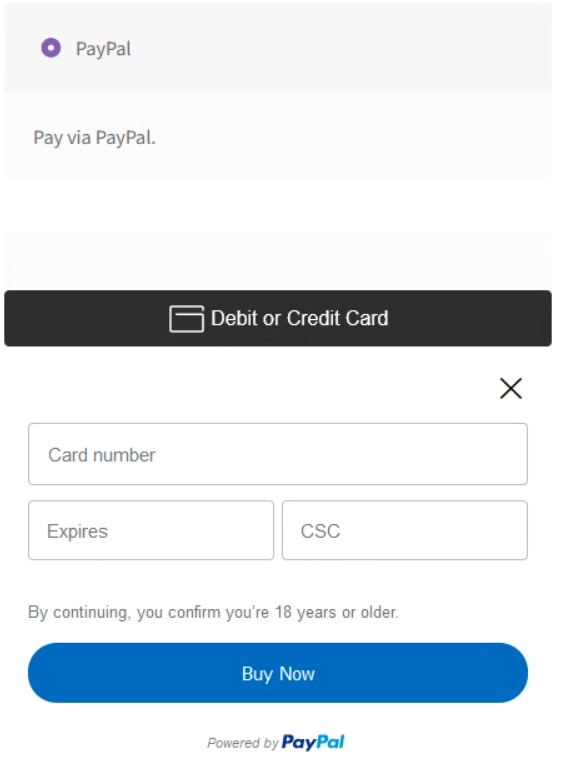
Choose to display the buttons of
– Debit or Credit Card
– Venmo (US customers only)
– PayPal Later
By default, it displays all of them, you can uncheck certain item to hide it.
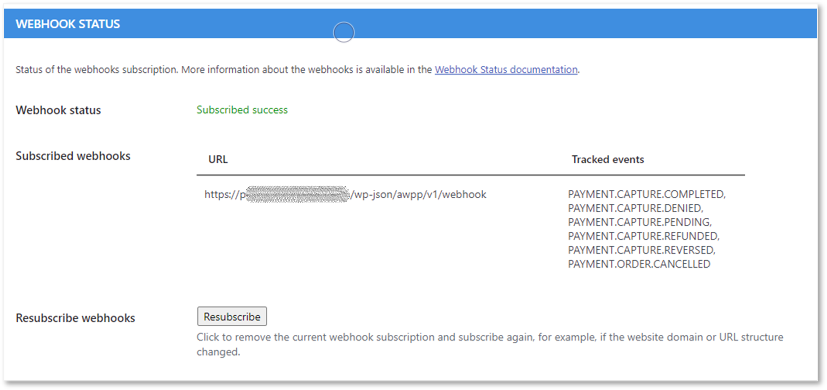
Webhook Status
In the tab of CONNECT PAYPAL, Once you have completed your PayPal account connection, it will configures the relevant webhooks automatically and displays the WEBHOOK STATUS.
The section provides an interface to simulate and resubscribe to the webhooks. Sometimes resubscribing to the webhooks can be helpful in case when WooCommerce orders are not reflecting their status after a completed payment or refunds have been processed at PayPal.
To ensure the latest webhook subscription, click on Resubscribe to verify if the webhooks are subscribed successfully.
Customer Experiences
Sandbox Test
Sandbox Configuration
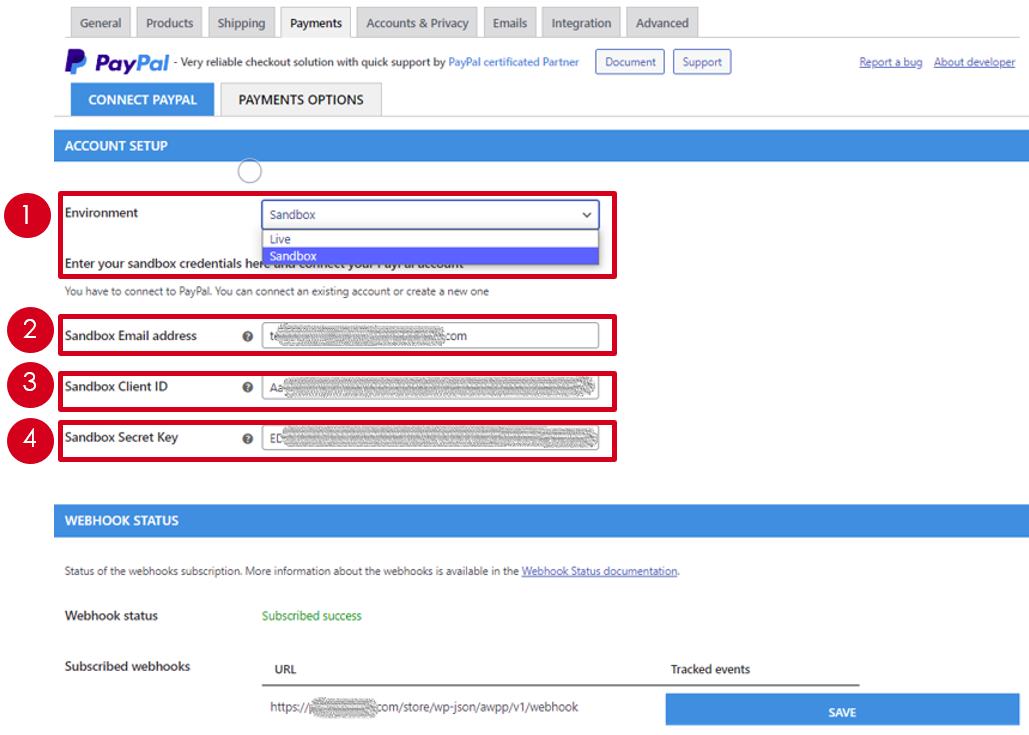
For Sandbox test, on the interface of PayPal setup, please change the environment to Sandbox.
1. Change Environment to Sandbox
2. Sandbox Email Address (Your Sandbox account)
3. Sandbox Client ID
4. Sandbox Secret Key
Click on SAVE after it’s done.
Obtain Sandbox Email, Client ID & Sandbox Secret Key
1. To obtain sandbox client ID & secret key, please visit https://developer.paypal.com/dashboard/ & login with your PayPal account, in the dashboard, change Live to Sandbox as the screenshot.
2. Click on the menu of Apps & Credentials
3. You will see a APP or create a new one. Click on the APP name, you can see the Sandbox account (email), client ID & secret key.
On the page of SANBOX API CREDENTIALS, can copy the
– Sandbox Account (Sandbox email)
– Sandbox Client ID
– Secret (Click on show to see it)

